Arduino’s latest launch, the Arduino Nano R4, is a powerful new upgrade to the beloved Nano family, bringing the impressive capabilities of the UNO R4 into a small, versatile package. But what exactly makes it stand out, and why should makers and professionals care?

Let's dive into everything you need to know about the Nano R4.

What Exactly is the Arduino Nano R4?

The Arduino Nano R4 is a significant upgrade to Arduino’s popular Nano line, powered by the Renesas RA4M1 microcontroller. Imagine taking the powerful brains of the Arduino UNO R4 and shrinking them into a tiny, versatile form. With a 48 MHz Arm Cortex-M4F core, 256 KB of flash storage, and integrated EEPROM, the Nano R4 provides remarkable performance in a miniature footprint.

Regardless of whether you're prototyping, building IoT projects, or designing space-conscious hardware, the Nano R4 is designed to streamline your workflow and empower your creativity.

What's New in the Arduino Nano R4?

The Nano R4 offers  exciting new features, making it one of Arduino’s most attractive small boards ever released:

  • Enhanced Processing Power: 48 MHz Arm Cortex-M4F MCU (Renesas RA4M1).
  • Expanded Memory: 256 KB Flash, 32 KB SRAM, and 8 KB EEPROM.
  • Compact & Production-Friendly: Single-sided component placement and castellated headers for easy PCB integration.
  • Versatile Connectivity: USB-C, built-in 3.3V Qwiic I²C connector, additional 5V I²C compatibility, UART, SPI, PWM, DAC, and CAN bus support.
  • Real-Time Clock (RTC): An integrated RTC with battery backup capability for accurate timekeeping.
  • RGB LED Indicator: Onboard LED for debugging, feedback, or user-interface enhancements.

Looking to Fast-Track Your Arduino Hardware Design?

Browse the shield templates below, each pre-aligned with headers, that let hardware engineers move from concept to working prototype in record time. Choose a template, customize it to your needs, and start building.

  1. Arduino MKR Wifi Template
  2. Arduino Nano 33 Template
  3. Arduino MKR Zero Template
  4. Arduino Nano RP2040 Template

Can I run my UNO R4 Minima sketch on a Nano R4?

Arduino Nano R4 keeps the classic Nano pin layout, so headers, shields, and breadboard wiring stay the same. Yes, just remap the pin numbers to match the Nano R4 layout. The Nano breakout connectors pinout is shown below:

Analog (JP1)

Pin Function Type Description
1 D13 / SCK Digital Serial Clock
2 +3V3 Power Out +3V3 Power Rail
3 B0 / AREF Analog Analog Reference
4 A0 Analog Analog input 0 / DAC
5 A1 Analog Analog input 1 / OPAMP +
6 A2 Analog Analog input 2 / OPAMP –
7 A3 Analog Analog input 3 / OPAMP Out
8 A4 Analog Analog input 4 / I²C Serial Data (SDA)
9 A5 Analog Analog input 5 / I²C Serial Clock (SCL)
10 A6 Analog Analog input 6
11 A7 Analog Analog input 7
12 5V Power USB power (5 V)
13 BOOT1 Mode Board Reset 1
14 GND Power Ground
15 VIN Power Voltage Input

Digital (JP2)

Pin Function Type Description
15 D12 / CIPO Digital Controller In Peripheral Out
14 D11 / COPI Digital Controller Out Peripheral In / PWM
13 D10 / CS Digital Chip Select / PWM
12 D9 Digital Digital pin 9 / PWM
11 D8 Digital Digital pin 8
10 D7 Digital Digital pin 7
9 D6 Digital Digital pin 6 / PWM
8 D5 Digital Digital pin 5 / PWM / CAN (RX)
7 D4 Digital Digital pin 4 / CAN (TX)
6 D3 Digital Digital pin 3 / PWM
5 D2 Digital Digital pin 2
4 GND Power Ground
3 RST Internal Reset (features a button)
2 D0 / RX Digital Digital pin 0 / Serial Receiver (RX)
1 D1 / TX Digital Digital pin 1 / Serial Transmitter (TX)

Why Does the Nano R4 Matter to Makers?

Compact Size, Big Performance

Nano R4 packs high-end functionality previously reserved for larger Arduino boards into a sleek, ultra-compact form factor. This allows makers to design more sophisticated, compact IoT and wearable projects without compromising power or features.

Seamless Transition from UNO R4

Already using Arduino’s popular UNO R4 boards? The Nano R4 offers complete compatibility with UNO R4’s software ecosystem, meaning your existing libraries, sketches, and workflows transfer smoothly to your Nano-sized projects.

Production Ready & Cost-Effective

The castellated headers and single-sided components ensure easy and cost-effective manufacturing—perfect for makers looking to transition prototypes into commercial products quickly and affordably.

Improved Connectivity and Expansion

The integrated Qwiic connector and additional I²C lines allow effortless integration of sensors, displays, and other peripherals. Add the RTC and RGB LED, and you have a remarkably versatile board ready for endless applications.

Who Is the Arduino Nano R4 Designed For?

The Nano R4 meets a variety of needs:

  • Hobbyists & Students: Easy-to-use and powerful enough to handle beginner and advanced projects alike.
  • Product Developers: Small, affordable, and production-ready for embedding into commercial hardware.
  • Educators: Compact form factor and compatibility with Arduino IDE make it ideal for teaching embedded systems, robotics, and IoT concepts.

How Does Nano R4 Compare to Previous Arduino Boards?

Compared to older Nano models (Nano Every or Nano 33), the Nano R4 offers substantial performance and memory improvements:

Feature Arduino Nano R4 Arduino Nano Every Arduino Nano 33 IoT
Microcontroller Renesas RA4M1 (32-bit) ATmega4809 (8-bit) SAMD21 Cortex-M0+ (32-bit)
Clock Speed 48 MHz 20 MHz 48 MHz
Flash Memory 256 KB 48 KB 256 KB
SRAM 32 KB 6 KB 32 KB
EEPROM 8 KB 256 bytes None
RTC ✅ Integrated ❌ Not integrated ❌ Not integrated
Connectivity USB-C, I²C, UART, SPI, CAN Micro USB, UART, SPI, I²C Micro USB, Wi-Fi, Bluetooth
Form Factor Nano-sized, castellated PCB Nano-sized Nano-sized

The Nano R4 brings many of the features previously only available in higher-end Arduino boards into a Nano-sized form factor.

Why Should You Upgrade to the Arduino Nano R4?

If you're currently using older Nano boards or even an Arduino UNO, here are quick reasons to make the jump to Nano R4:

  • Power & Performance: Significant upgrade with faster processing and more memory.
  • Better Compatibility: Simplified transition from UNO-based projects.
  • Lower Cost & Easier Manufacturing: Perfect for small-scale production or commercial projects.
  • Versatile Applications: Suitable for IoT, robotics, wearables, automation, and more.
  • Future-Proof: Modern features like USB-C, RTC, and expanded connectivity mean longer-lasting project relevance.

Where Can You Get the Arduino Nano R4?

The Arduino Nano R4 is available in two variations:

  • Without Headers: Ideal for embedding into custom PCB designs (around $12.10).
  • With Pre-soldered Headers: Ready for quick prototyping and breadboarding (around $13.30).

Both versions are available directly from Arduino's online store and major electronics distributors.

Ready to Start Your Nano R4 Project?

Arduino’s Nano R4 sets a new standard for compact, powerful, and production-friendly microcontroller boards. Whether you’re prototyping the next big IoT device or scaling your prototype for production, the Nano R4 offers the power and flexibility you need.

Visit our Featured Projects page to discover innovative Arduino builds and spark inspiration for your next big idea.

Profile avatar of the blog author

Jharwin Barrozo

Jharwin is an electronics engineer mainly focused on satellites. He built his own ground station using Flux to monitor RF activities on the International Space Station. Find him on Flux @jharwinbarrozo

Go 10x faster from idea to PCB
Work with Flux like an engineering intern—automating the grunt work, learning your standards, explaining its decisions, and checking in for feedback at key moments.
Illustration of sub-layout. Several groups of parts and traces hover above a layout.
Design PCBs with AI
Introducing a new way to work: Give Flux a job and it plans, explains, and executes workflows inside a full browser-based eCAD you can edit anytime.
Screenshot of the Flux app showing a PCB in 3D mode with collaborative cursors, a comment thread pinned on the canvas, and live pricing and availability for a part on the board.

Related Content

RP2350 A4 Stepping: Why Raspberry Pi Pico’s Latest Upgrade Changes Everything

RP2350 A4 Stepping: Why Raspberry Pi Pico’s Latest Upgrade Changes Everything

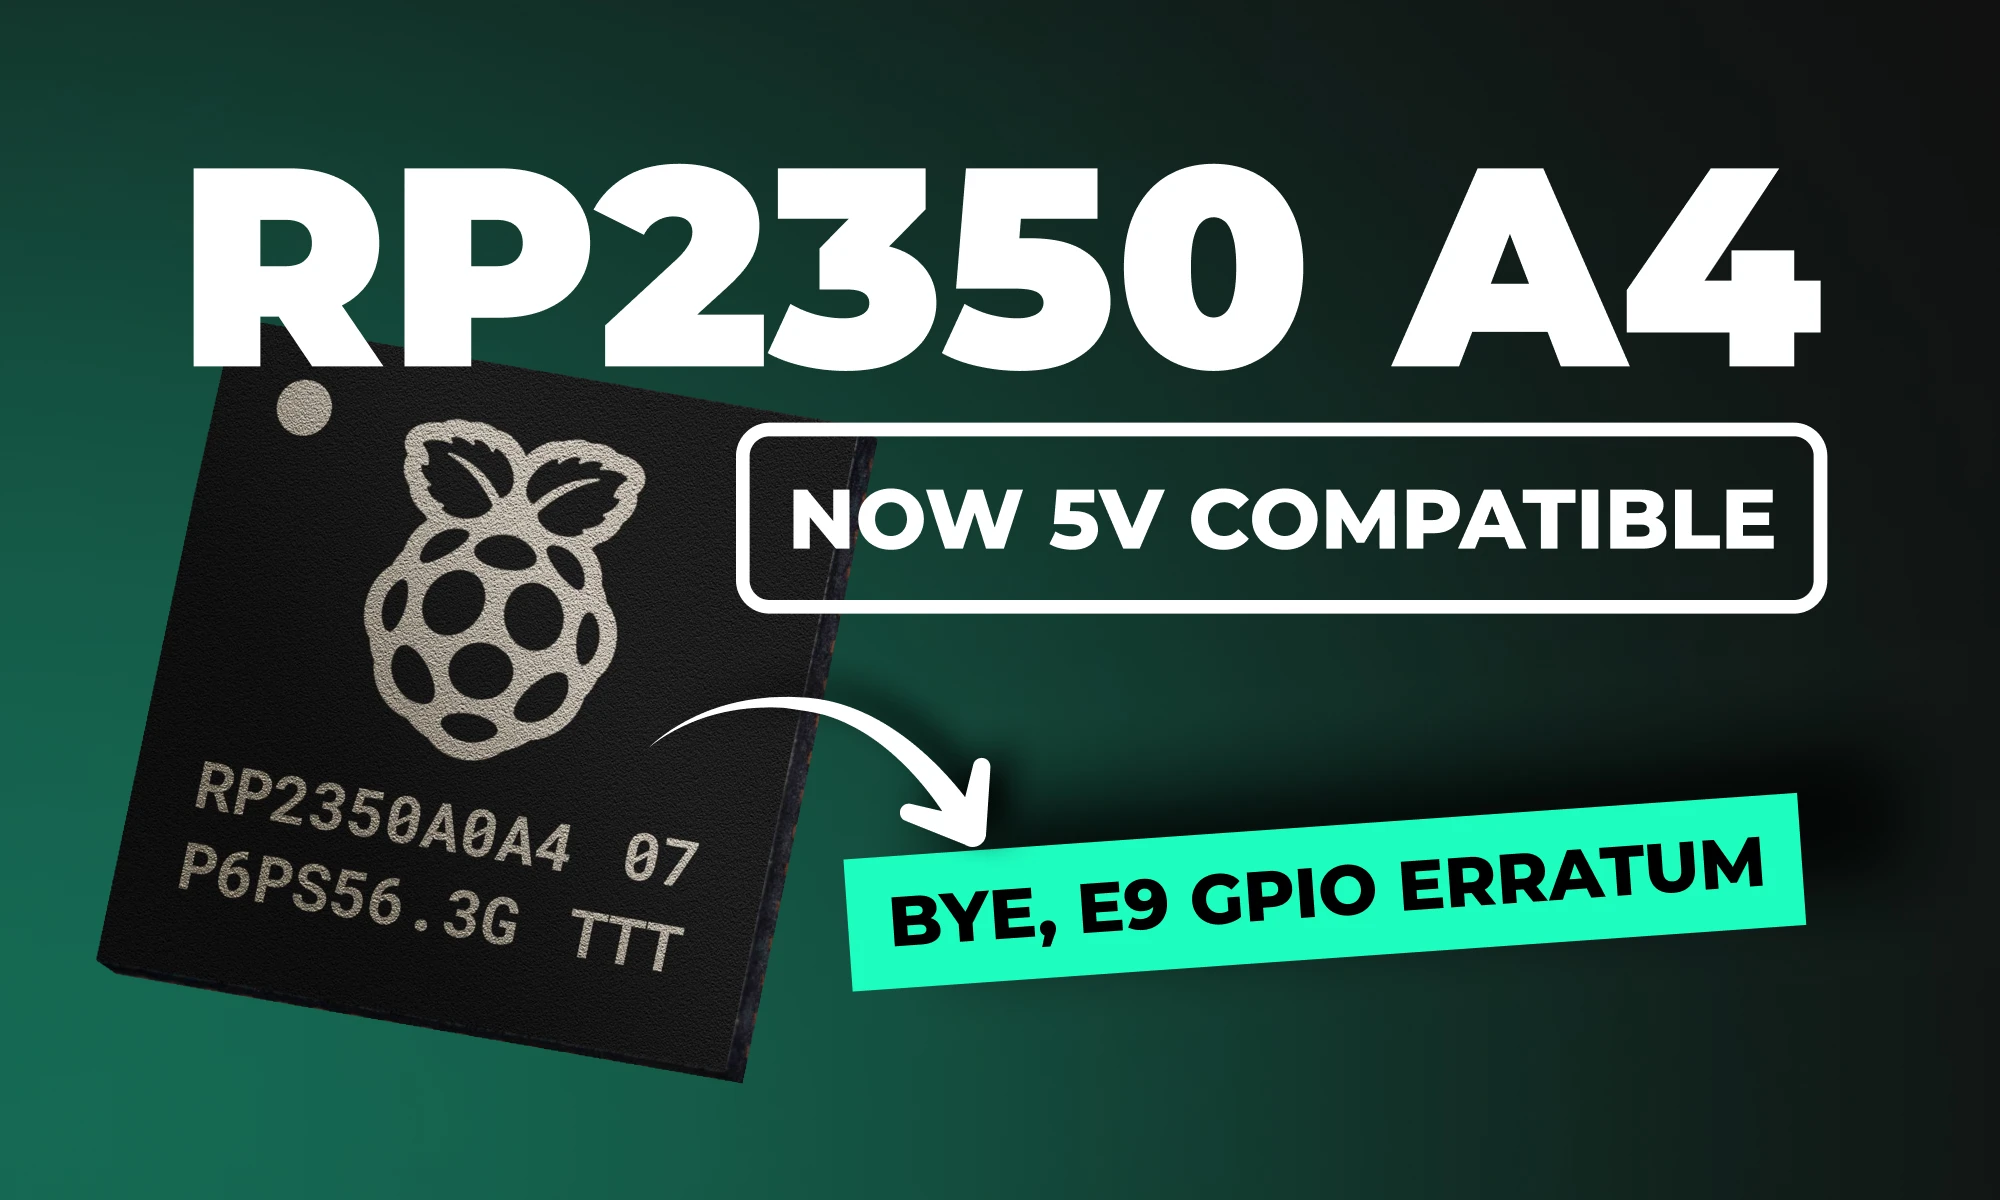
RP2350 A4 fixes GPIO bug, hardens security, adds 5 V tolerance and on-chip flash. See why every Pico project should migrate.

Profile avatar of Jharwin Barrozo
Jharwin Barrozo
|August 7, 2025
STM32: Things You Need to Know

STM32: Things You Need to Know

Learn about STM32 microcontrollers, popular series, USB OTG, SWD, UART, and development tools. Find the right STM32 MCU and kickstart your projects.

Profile avatar of Jharwin Barrozo
Jharwin Barrozo
|October 3, 2024
ESP8266 Pinout Guide: Complete GPIO Reference & IoT Project Tips

ESP8266 Pinout Guide: Complete GPIO Reference & IoT Project Tips

Looking for a comprehensive guide to ESP8266 pinout? Check out our article that covers everything you need to know about the ESP8266's pins, including digital, analog, and PWM pins. Perfect for beginners and experts alike, our guide will help you understand the ESP8266's pinout and how to use it in your projects.

Profile avatar of Jharwin Barrozo
Jharwin Barrozo
|November 3, 2023
ESP32 Pinout: Everything You Need to Know

ESP32 Pinout: Everything You Need to Know

Looking for a comprehensive guide to ESP32 pinout? Check out our article that covers everything you need to know about the ESP32's pins, including digital, analog, PWM, and Strapping pins. Perfect for beginners and experts alike, our guide will help you understand the ESP32's pinout and how to use it in your projects.

Profile avatar of Jharwin Barrozo
Jharwin Barrozo
|March 2, 2023
Raspberry Pi Zero 2 W Review: a Powerful and Affordable Mini Computer

Raspberry Pi Zero 2 W Review: a Powerful and Affordable Mini Computer

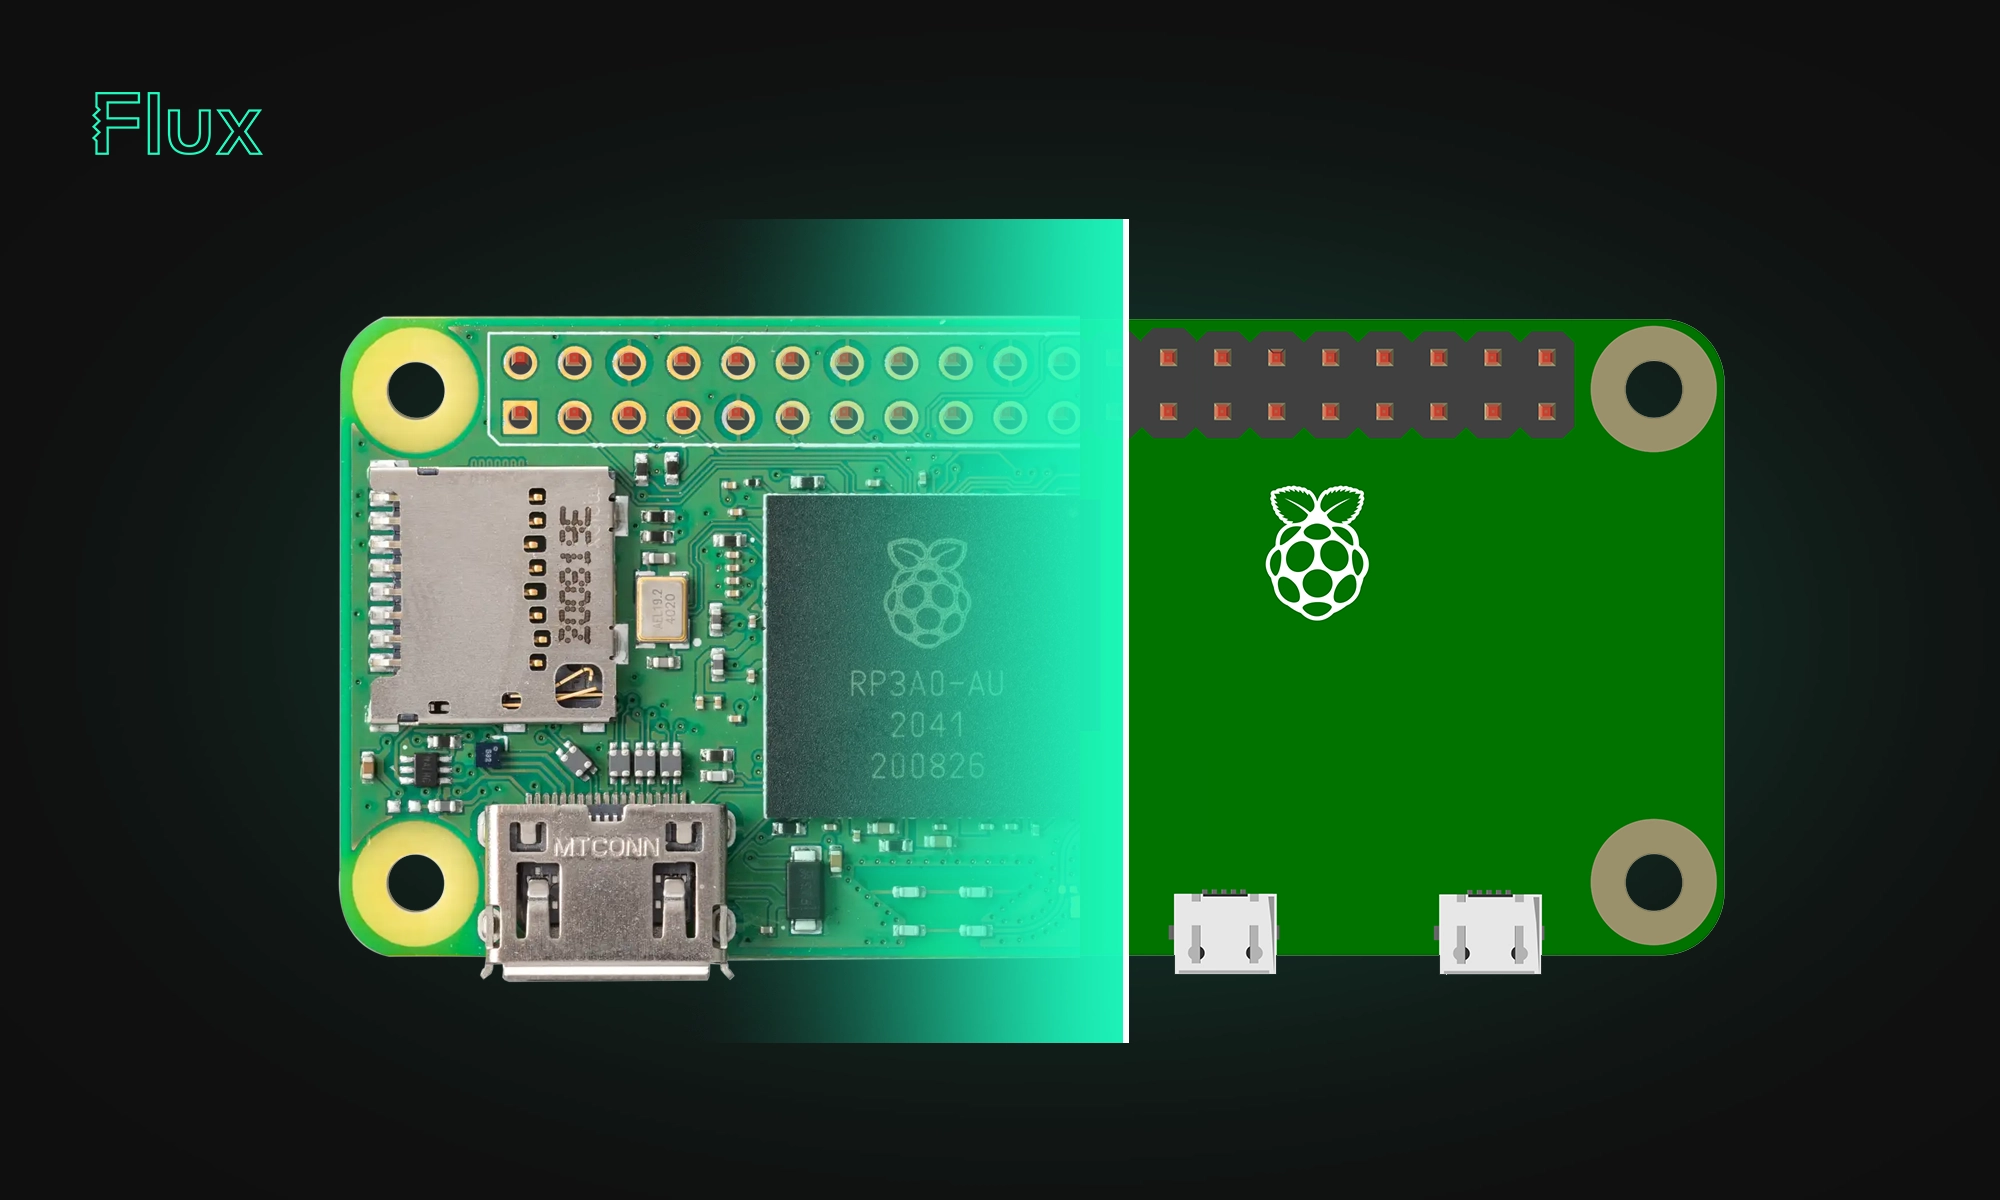
The Raspberry Pi Zero 2 W is a small and powerful computer with impressive performance for its size and price. With a quad-core processor, 512MB of RAM, built-in wireless connectivity, and a USB On-The-Go port, it's suitable for many projects, including home automation, media centers, and robotics.

Profile avatar of Jharwin Barrozo
Jharwin Barrozo
|February 25, 2023
Raspberry Pi Pinouts: A Comprehensive Guide

Raspberry Pi Pinouts: A Comprehensive Guide

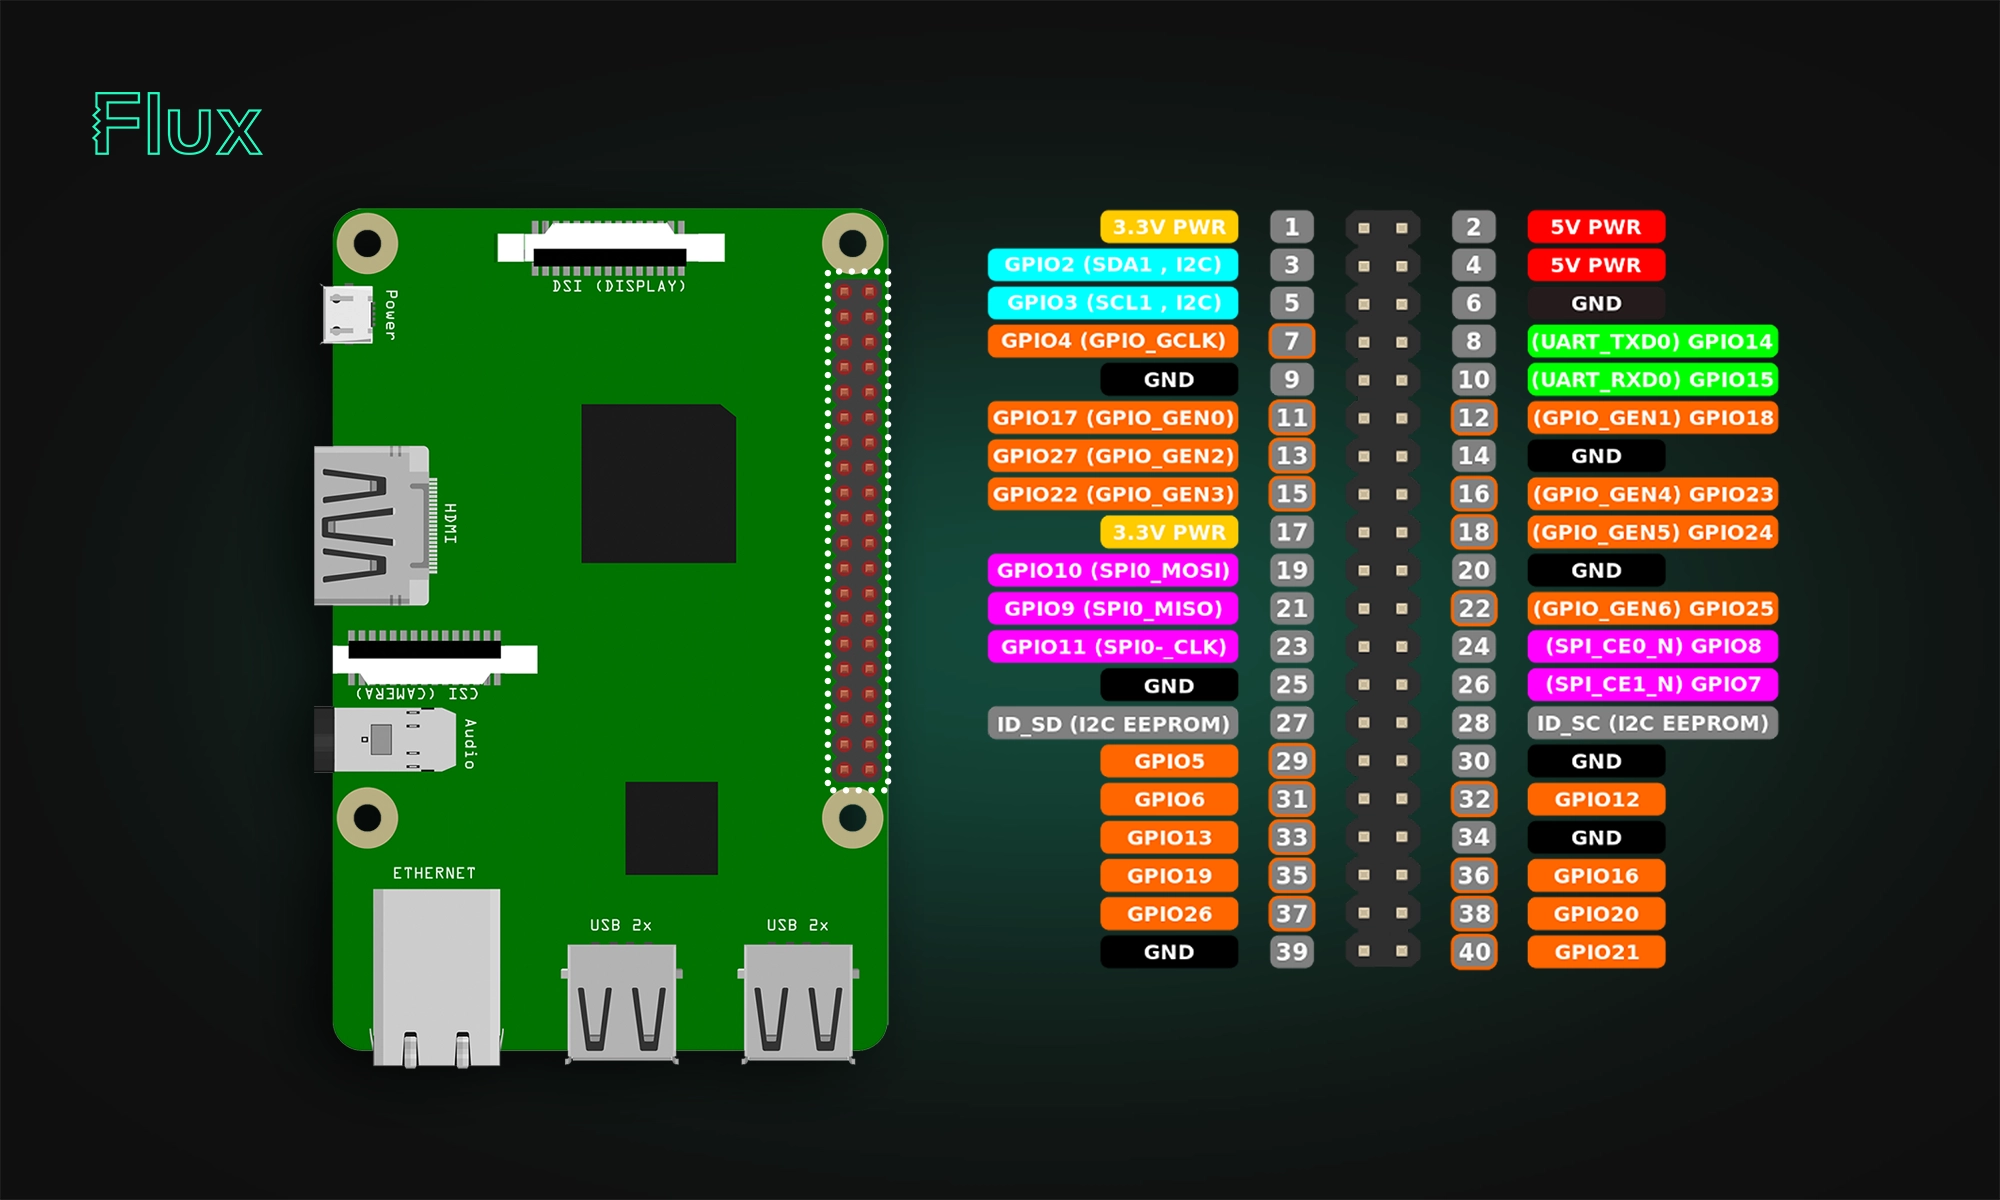
In this article, we will provide a comprehensive guide to the Raspberry Pi pinout diagram, including a description of each pin and its functions.

Profile avatar of Lance Cassidy
Lance Cassidy
|February 4, 2023
Design Rule Checking (DRC) in PCB Design: Real-Time vs Batch, Rules, and Common Failures

Design Rule Checking (DRC) in PCB Design: Real-Time vs Batch, Rules, and Common Failures

DRC is an automated process that checks your PCB layout against manufacturing and electrical constraints, catching errors like trace spacing and drill sizes before fabrication. Modern tools run this in real-time during design, while older ones batch-check at the end, often producing overwhelming error lists.

Profile avatar of Yaneev Hacohen
Yaneev Hacohen
|March 26, 2026
Multilayer PCB Design: Best Practices for Circuit Board Layout

Multilayer PCB Design: Best Practices for Circuit Board Layout

Mastering multilayer PCB design is key for complex electronics. Use strategic stackup (Signal-Ground-Power-Signal), perpendicular routing, and solid ground/power planes to ensure signal integrity, reduce EMI, and support high-density components for applications like IoT and robotics.

Profile avatar of Yaneev Hacohen
Yaneev Hacohen
|March 19, 2026